2 best ways to take a screenshot on every iPad

It’s a well-known thing that screenshots are more than useful on so many occasions. Sometimes, we can even say they are a necessity. That’s why we decided to teach you how to take a screenshot on every iPad device. After all, we already spoke about taking screenshots on Chrome, and now it time to talk about specific devices.
There is two different and quite successful way for you to take a screenshot on every iPad. The first one is using the physical buttons. But if this one fails, there is one more way. You can take a screenshot on every iPad with the help of the digital AssistiveTouch function.
On this page:
How to take a screenshot on every iPad using buttons?
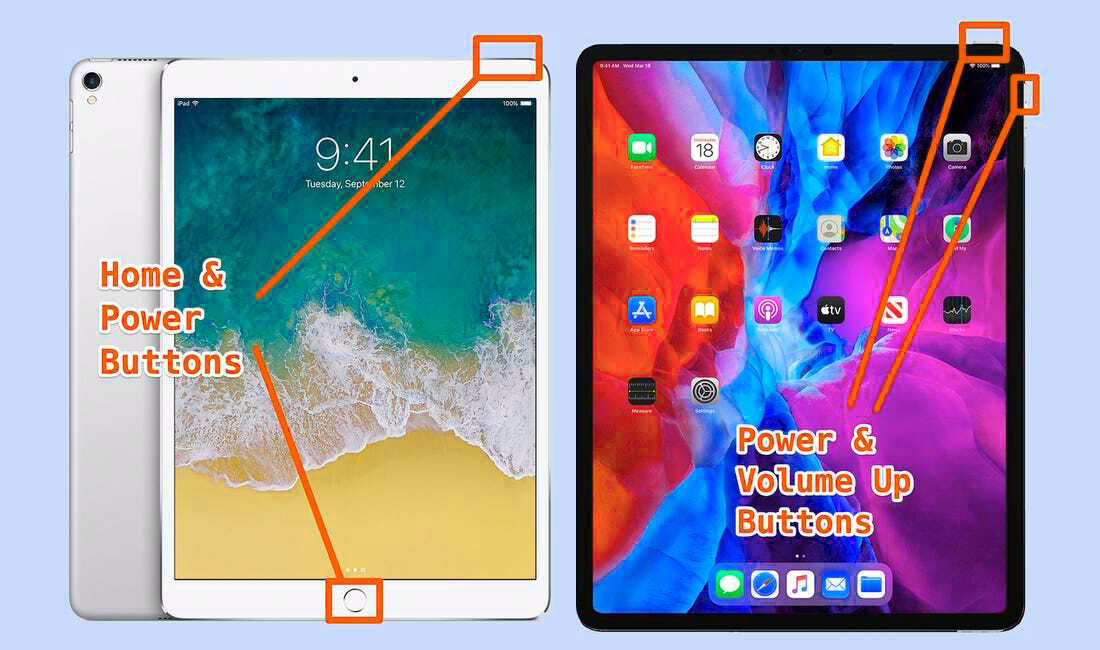
The easiest way to take a screenshot on every iPad is by using the Home and Power buttons. However, this is not the case if you are an owner of 2018 and 2020 iPad Pros or 2020 iPad Air because they lack a Home button. In that case, you should use Power and Level Up buttons or go straight to the second title.
After you press the previously mentioned buttons, your iPad screen will flash, and the screenshot will appear at the bottom corner of your screen. Also, the shot will be automatically saved.
You can even take a screenshot of the whole webpage, even if it is too big to fit in one picture. Just do the initial screenshot on every iPad and then tao the preview as soon as it appears. At the top, you should find the Full Page option and the Done button right after. Next, press the Save PDF to Files option, and you are done.
How to take a screenshot on every iPad with AssistiveTouch?
If you don’t want to take a screenshot on an iPad with buttons, you should probably use AssistiveTouch. This feature allows the fulfillment of several different tasks, and a screenshot is one of them. Just follow the steps below, and you will take a screenshot on iPad in no time.
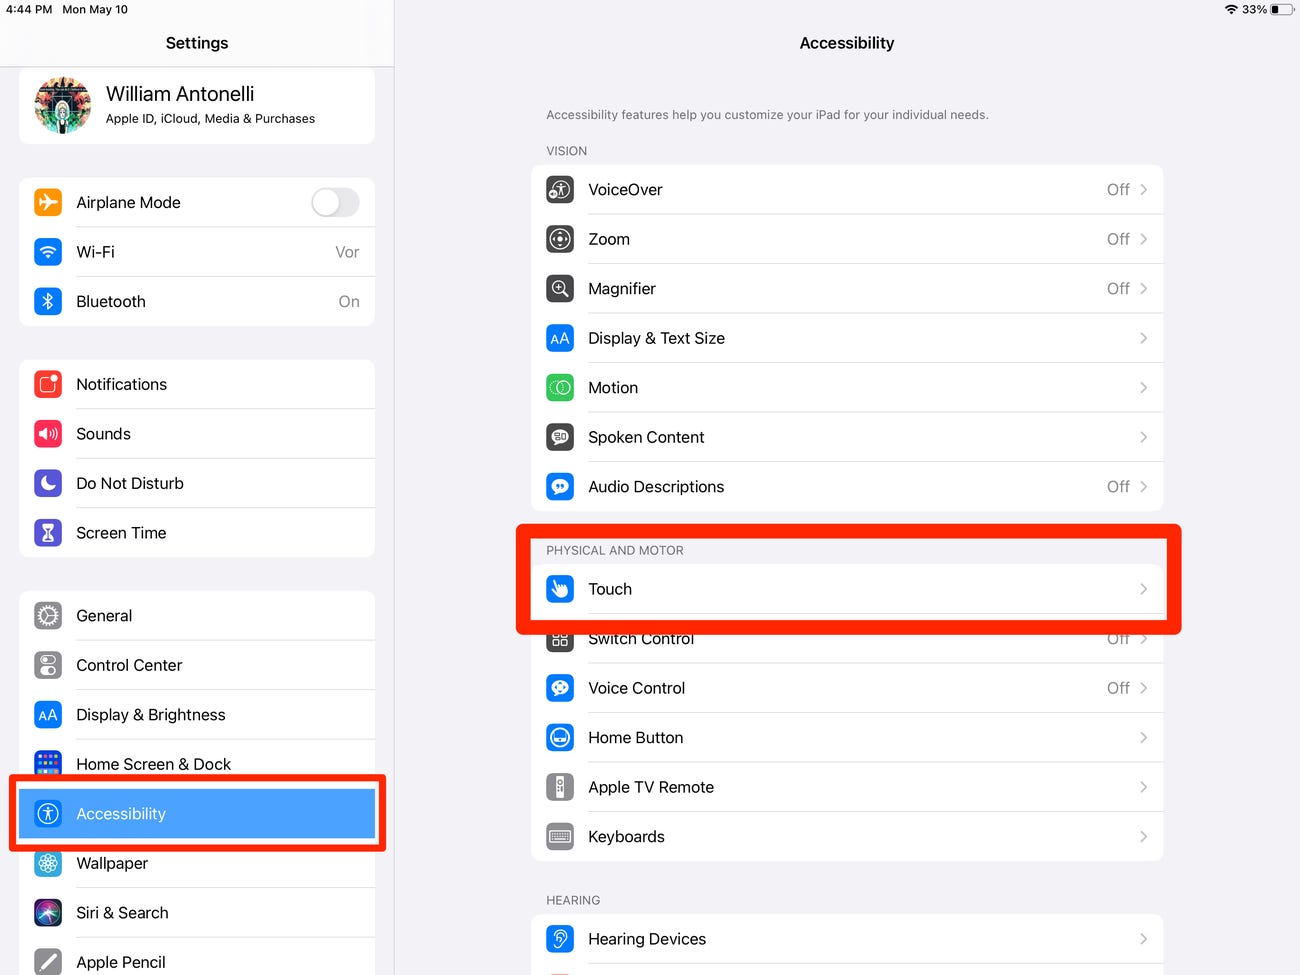
STEP 1
Turn on AssistiveTouch and then open the iPad’s Settings app. Next, tap on the Accessibility option. The Accessibility page will open.
STEP 2
On the Accessibility page, you have to find the Touch option and tap on it. A new window with a few options will appear.
STEP 3
On the new page, find the AssistiveTouch switch and turn it on. Right after that, choose the Double-Tap option. Next, a new window will appear.
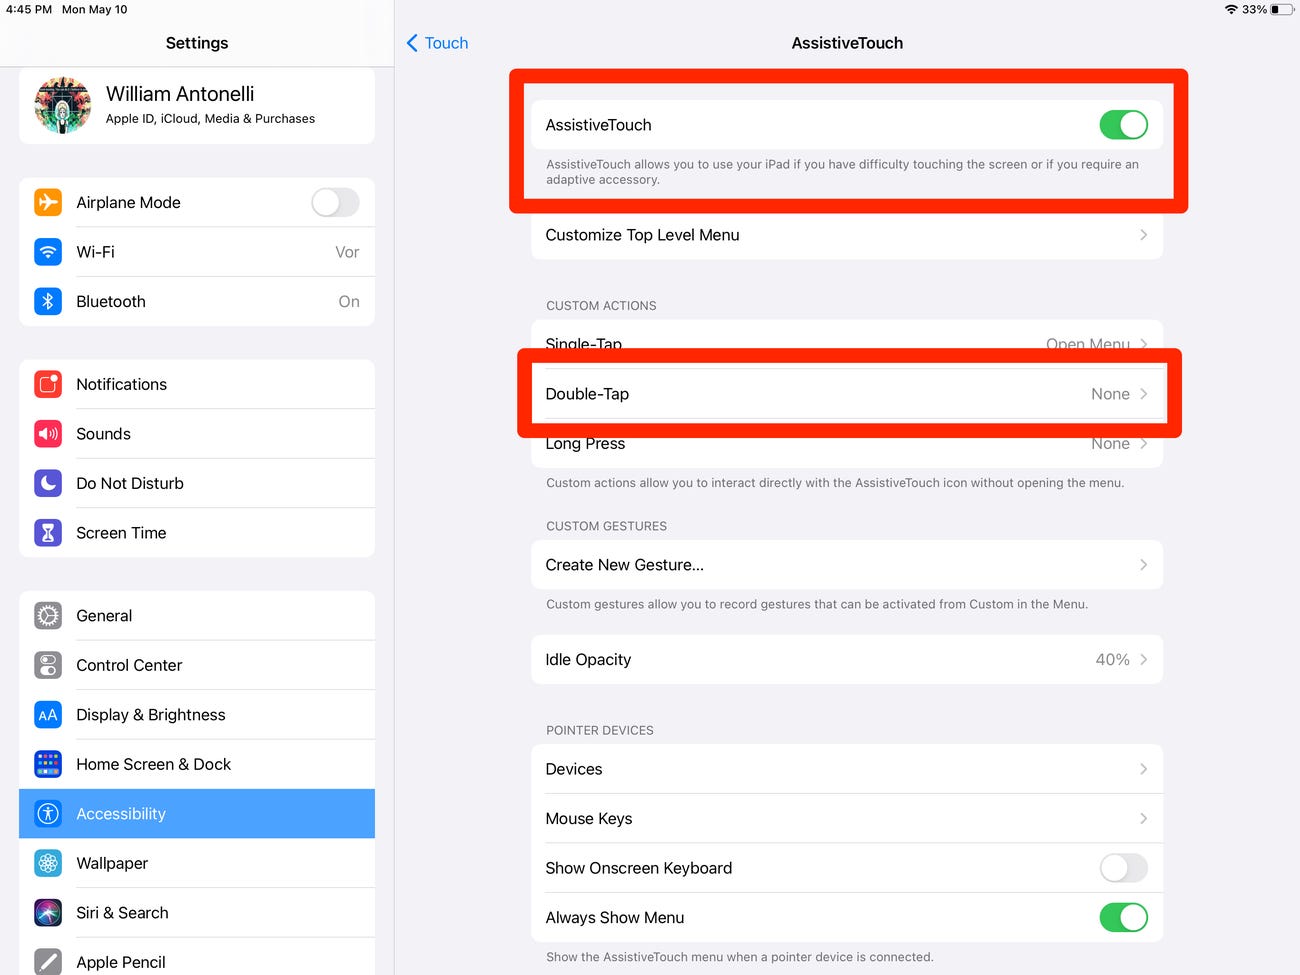
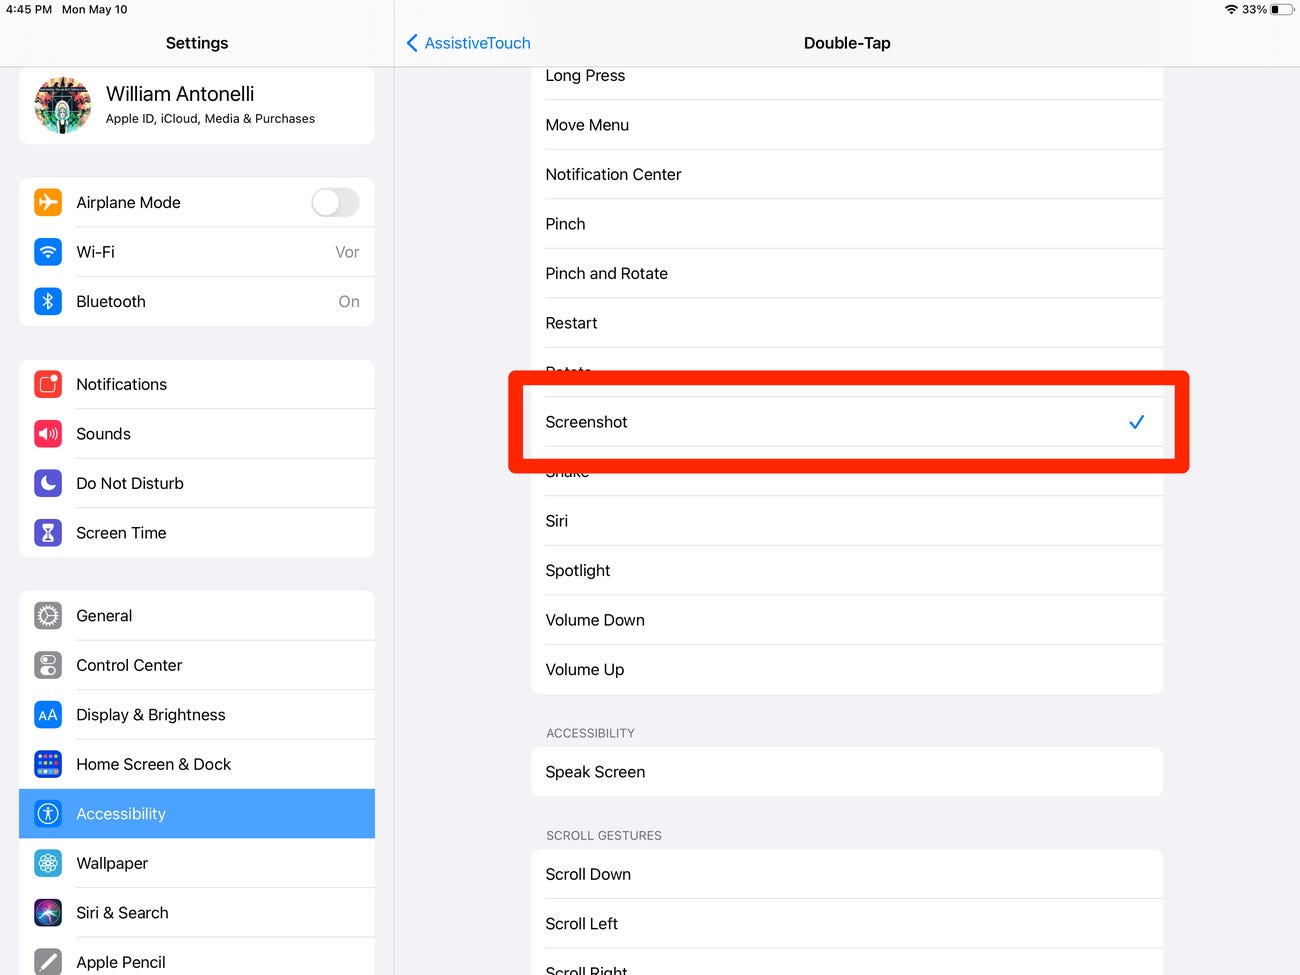
STEP 4
From the list in the new Double-Tap window, choose the Screenshot option, and that’s it.
Now, you should be able to take a screenshot on the iPad after double-taping on the gray AssistiveTouch button.
Final words
You can take a screenshot on every iPad in two different ways. The first one is with the Home and Power button or with Power and Volume Up ones.
The second way you can take a screenshot on every iPad is with AssistiveTouch, a built-in function every iOS has.
In the end, if none of the previously mentioned work for you, there is a third-party software you can use. However, it is completely unnecessary, because you can do this task easily without it.