Best way to add a superscript or subscript in Microsoft Word

If you ever created academic documents (and you know you did), you probably asked yourself: ‘how can I add a superscript or subscript in Microsoft Word’ at some point. Have you found the answer? If not, we’ve got you covered.
On this page:
The main difference between superscript and subscript
But first, let us explain to you the main difference between superscript and subscript. Superscript is usually placed slightly above the main line of text, and it is used to indicate footnotes and trademark symbols. This one is most common to every user, and it is often seen in academic documents.
On the other hand, subscripts are placed at the bottom corner of the mainline of text. They aren’t that common, like superscripts. However, they are used in science and math. Both are easy to use, and in the following lines, we will show you how to add a superscript or subscript in Microsoft Word on Windows and Mac devices.
How to add a superscript or subscript in Microsoft Word for Windows
If you are a Mac user, go through the following steps to add a superscript or subscript in Microsoft Word.
Add a superscript or subscript in Microsoft Word with buttons
The first way to add a superscript or subscript in Microsoft Word is with the superscript and subscript buttons.
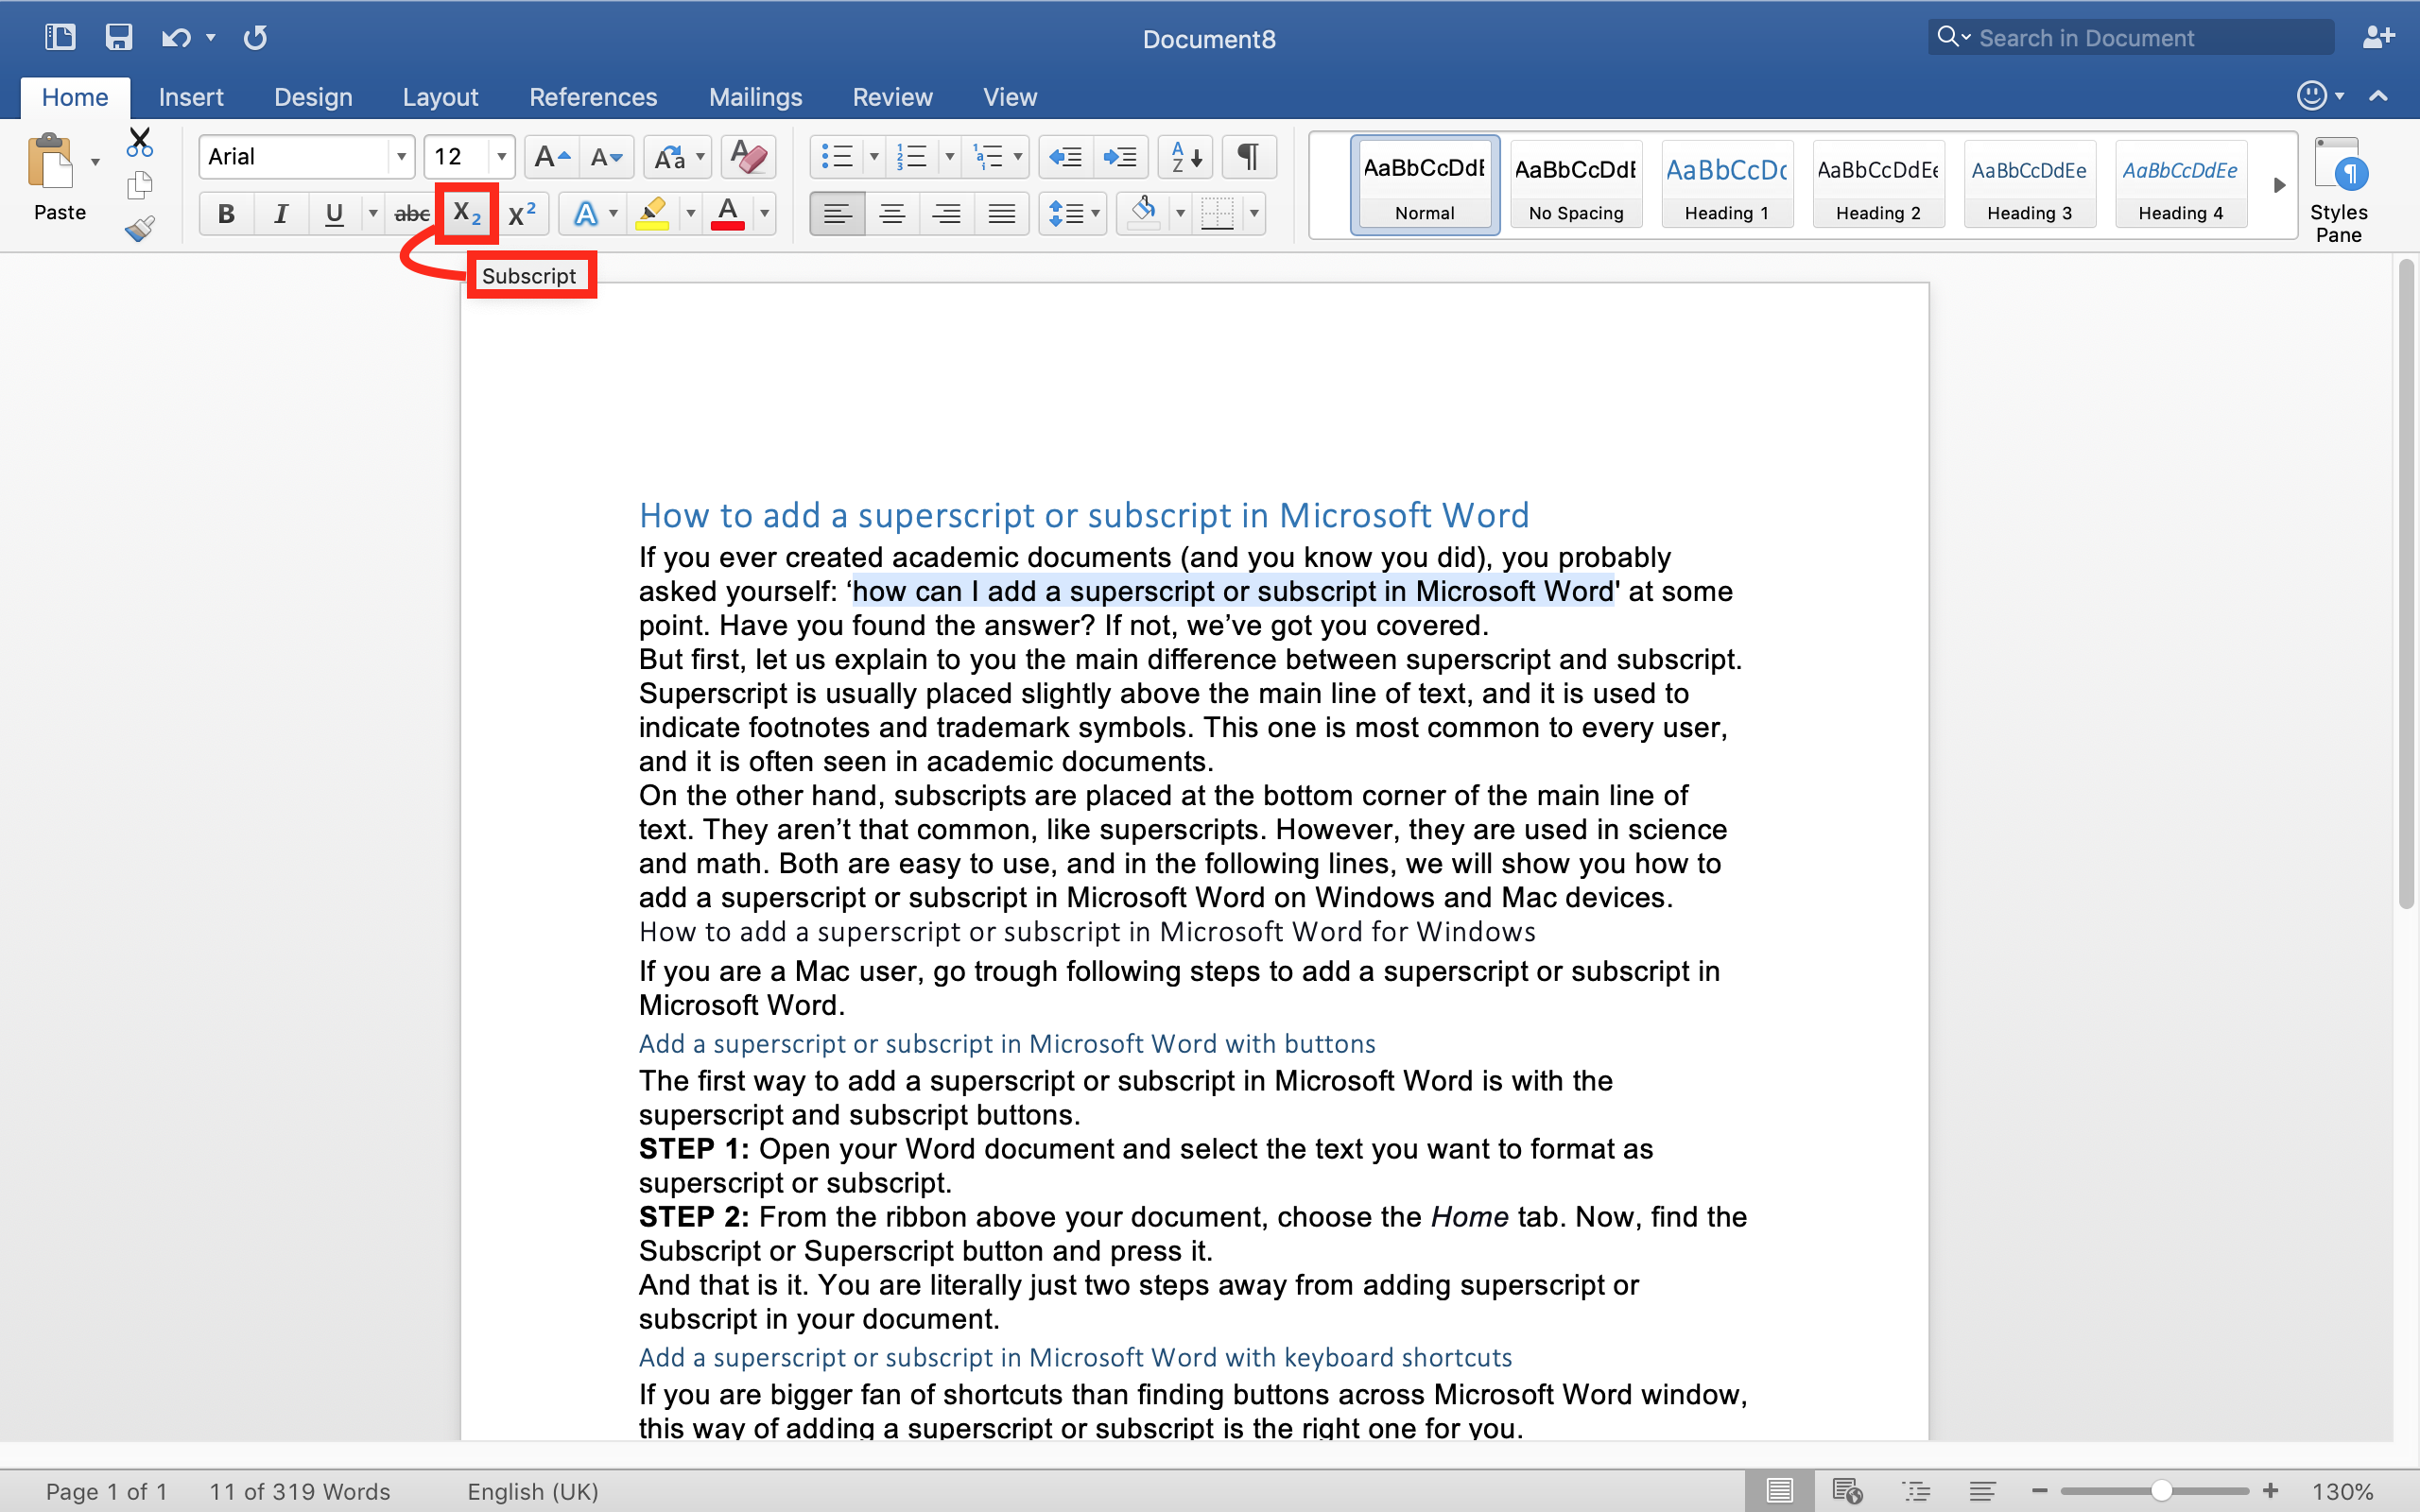
STEP 1: Open your Word document and select the text you want to format as superscript or subscript.
STEP 2: From the ribbon above your document, choose the Home tab. Now, find the Subscript or Superscript button and press it.
And that is it. You are literally just two steps away from adding superscript or subscript in your document.
Add a superscript or subscript in Microsoft Word with keyboard shortcuts
If you are a bigger fan of shortcuts than finding buttons across the Microsoft Word window, this way of adding a superscript or subscript is the right one for you.
STEP 1: The first step is the same as in the previous case. You have to select the text you want to format as superscript or subscript.
STEP 2: Now, if you want to add superscript, press CTRL + Shift + Plus sign key and press CTRL + Equal sign key for subscript.
And there you have it.
Add a superscript or subscript in Microsoft Word with Font dialog box
The third way you can add superscript or subscript in Microsoft Word is with a Font dialog box. Just follow the steps below, and you will add previously mentioned in no time.
STEP 1: The first step is the same in every case. Select the text you want to format as superscript or subscript.
STEP 2: From the ribbon at the top of the window, click on the Home tab. Then, open the Font dialog box by clicking on the arrow at the bottom-right of the Front section.
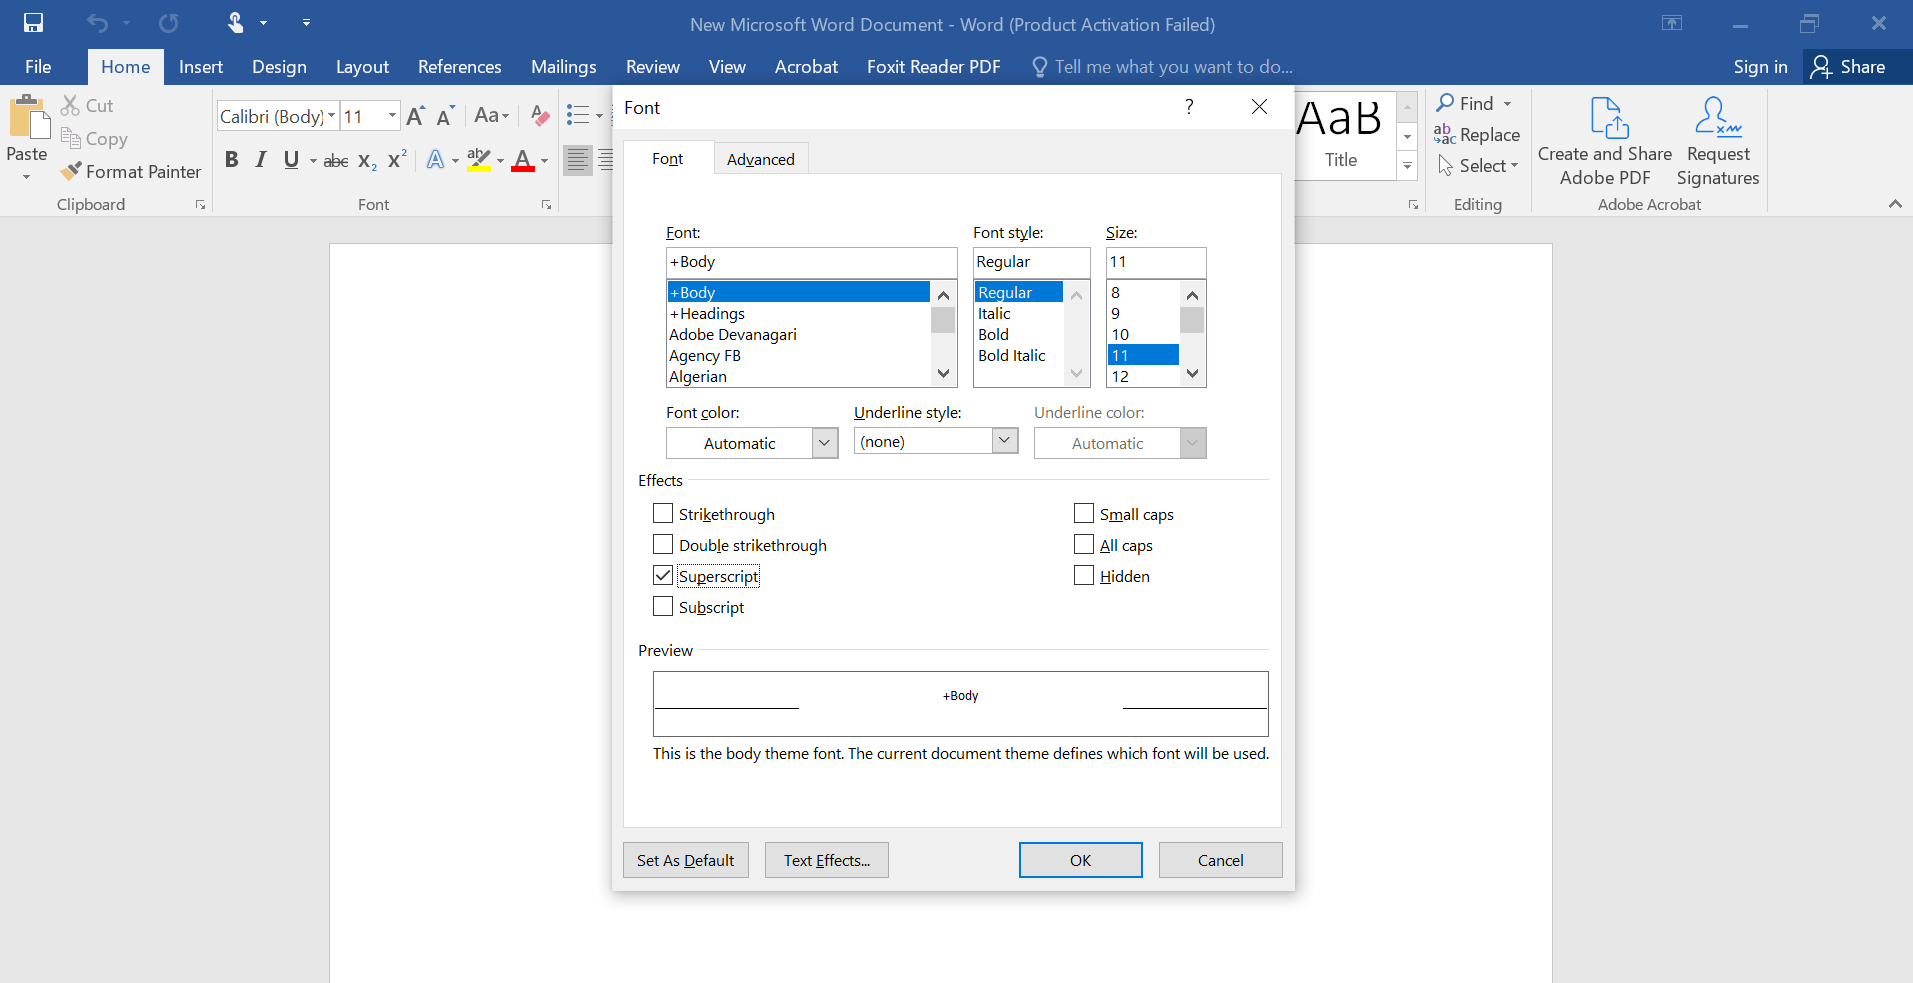
STEP 3: Pick the Superscript or Subscript box and click the OK option right after.
You are done! You just did the whole add superscript or subscript in Microsoft Word thing.
How to add a superscript or subscript in Microsoft Word for Mac
The good news for every Mac user is: you can ass a superscript or subscript in Microsoft Word in a few different ways. This time, we are going to show you our top two choices.
Add a superscript or subscript in Microsoft Word with buttons
The first way to add superscript or subscript in Microsoft Word on Mac is with superscript and subscript buttons. You have just two simple steps to follow, and that’s it.
STEP 1: Just like in every other mentioned Step 1, you have to select the text you want to format as superscript or subscript.
STEP 2: Now, choose the Home tab from the ribbon (that is at the top of your Microsoft Word window). Then, find the Superscript or Subscript in the lower row of the Font section.

Luckily, there is no step 3. Meaning you are done with the whole add superscript or subscript in Microsoft Word thing.
Add a superscript or subscript in Microsoft Word with keyboard shortcuts
Another way to add superscript or subscript in Microsoft Word is with shortcuts. Just follow the steps given below, and you will do the task in a few seconds.
STEP 1: Once again, the first step is to select the text you want to format as superscript or subscript.
STEP 2: Now, press the Command + Shift + Plus sign key for superscript and Command + Shift + Minus sign key for subscript.
And that’s it! This is by far the fastest way to add superscript or subscript in Microsoft Word. Don’t you think so?
How to add a superscript or subscript in Word Online
If you prefer creating Word documents online, there is a way to add superscript or subscript to your files with Word Online.
STEP 1: In your Word Online file, select the text you want to format as superscript or subscript.
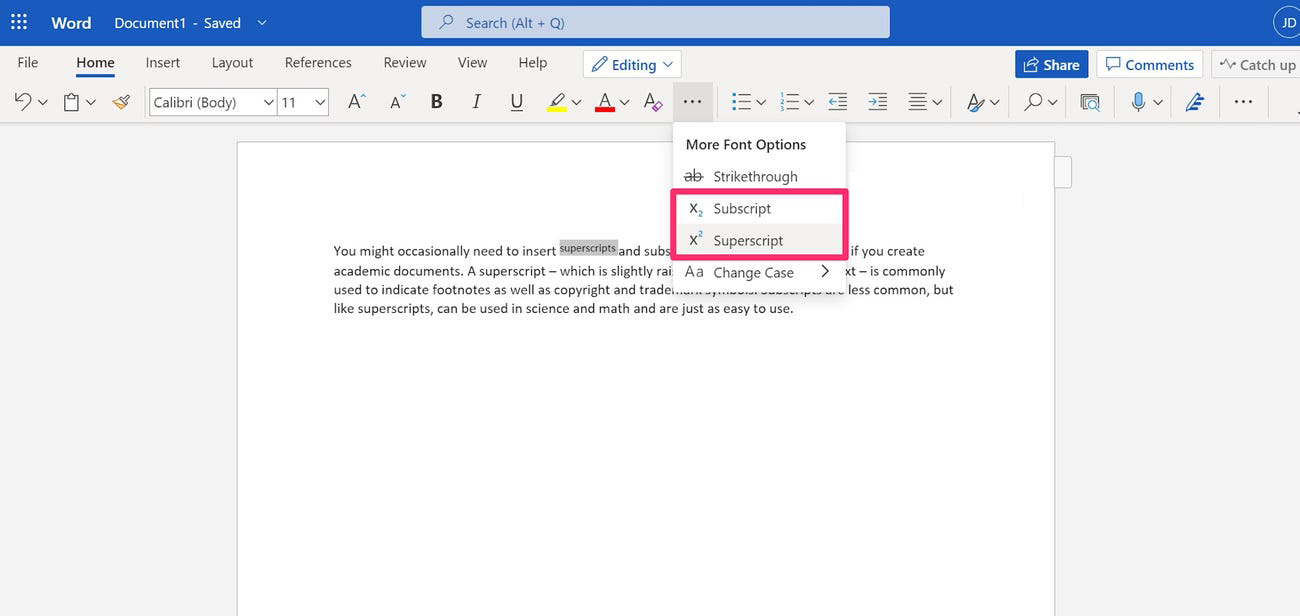
STEP 2: At the top of the page, in the Home tab, find the More Font Options (three dots).
STEP 3: In the new dialog box, click on the superscript or subscript option.
And there you have it! You have done the task the online way.
The final words
In the end, we have a tip or two for you. Besides previously mentioned ways to add superscript or subscript in Microsoft Word, you should probably know a few more facts.
It is a well-known thing that there are other writing apps and tools people use. However, because Word files are the most popular document file formats, ofter people convert other formats to DOC or DOCX.
So, if you want to add superscript or subscript to your document (that is in a different file format), you can convert your files first.
The easiest way to convert files is with a free online tool like Converter365’s document converter.