4 easy ways to record screen on every device

How many times did you need an easy way to record screens on different devices? Once? Twice? Several times? In the end, it doesn’t matter, because let’s face it, we’ve all been there more than once. Sure, the great thing is if your device has an app for this, but sometimes, that’s not the case. Usually, that’s when the panic kicks in. Luckily, we are here to show you how to record screens on different devices and operating systems.
On this page:
How to record screen with online tools?
Let’s start with the universal solution for the ‘how to record screen’ task. We are talking about online tools you can use on every device. Mostly, you can find these screen records in stores, and in most cases, they are completely free. However, finding the right one that doesn’t contain watermarks can be challenging.
Another thing about this way if the record screen is offline mode. A great tool needs to have an option for offline screen recording. Plus, the ideal case is that it saves files in one of the popular video file formats.
And if a free screen recorder has an option for video editing, you hit the main price. Although, you can do the editing part in programs specially created for it. The most popular ones by far are Adobe Premiere, Adobe After Effects, iMovie, etc. But if your main intention is a screen recording, we have a solution for you.
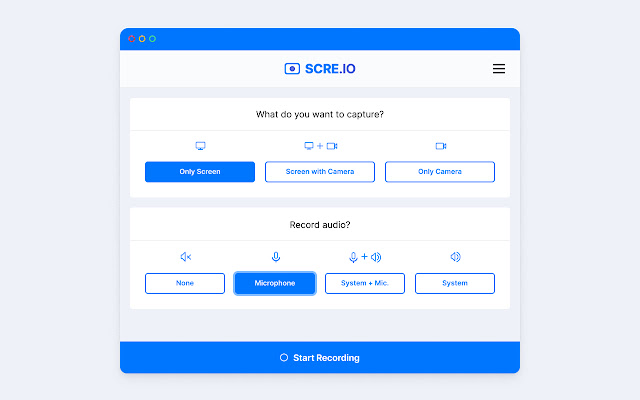
One of the most used tools you can use to record screens on your device is Screen Recorder. You can find this handy tool in Chrome Web Store. This free tool doesn’t have watermarks, and it allows you an unlimited number of recorded videos. Plus, you don’t even have to signup to use it.
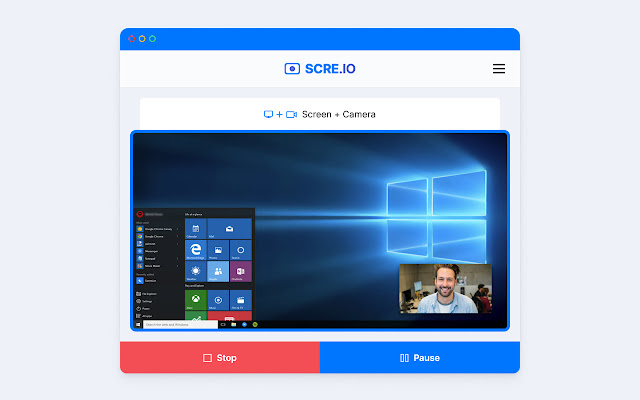
The Screen Recorder also has several handy features that will satisfy every user. For example, with this tool, you can record the screen and camera, and all recordings will be saved automatically. Also, you can use audio from the microphone and system together, which is the perfect feature if you have to record tutorials or any step-by-step instructions.
The recording procedure is quite an easy one. First, you have to download the Screen Recorder extension from Chrome Web Store and activate it. You will find the downloaded extension at the top right (where all extensions are), and after just two clicks, you start with to record screen. After you are finished, the file will be automatically saved and ready for use.
And that is it. There is not much to say except a word or two about the file format of your video. From time to time, we have to have a specific video format. So, if you need your files converted to other video formats (and the tool doesn’t support the wanted file format), just use an online video converter to help you with that task.
How to record screen on Mac?
If you don’t want to record the screen with online tools, you can do it. Mac devices have several ways for it, and we are going to show you the fastest ways to record the screen and record a selected portion of the screen.
How to record the entire screen on Mac?
If you want to record the entire screen on your Mac device, this is what you should do.
STEP 1
Open the Screenshot toolbar with Shift + Command + 5 buttons. Onscreen controls will appear.
STEP 2
Press the fourth icon (Record the entire screen button), and the pointer will change to a camera.
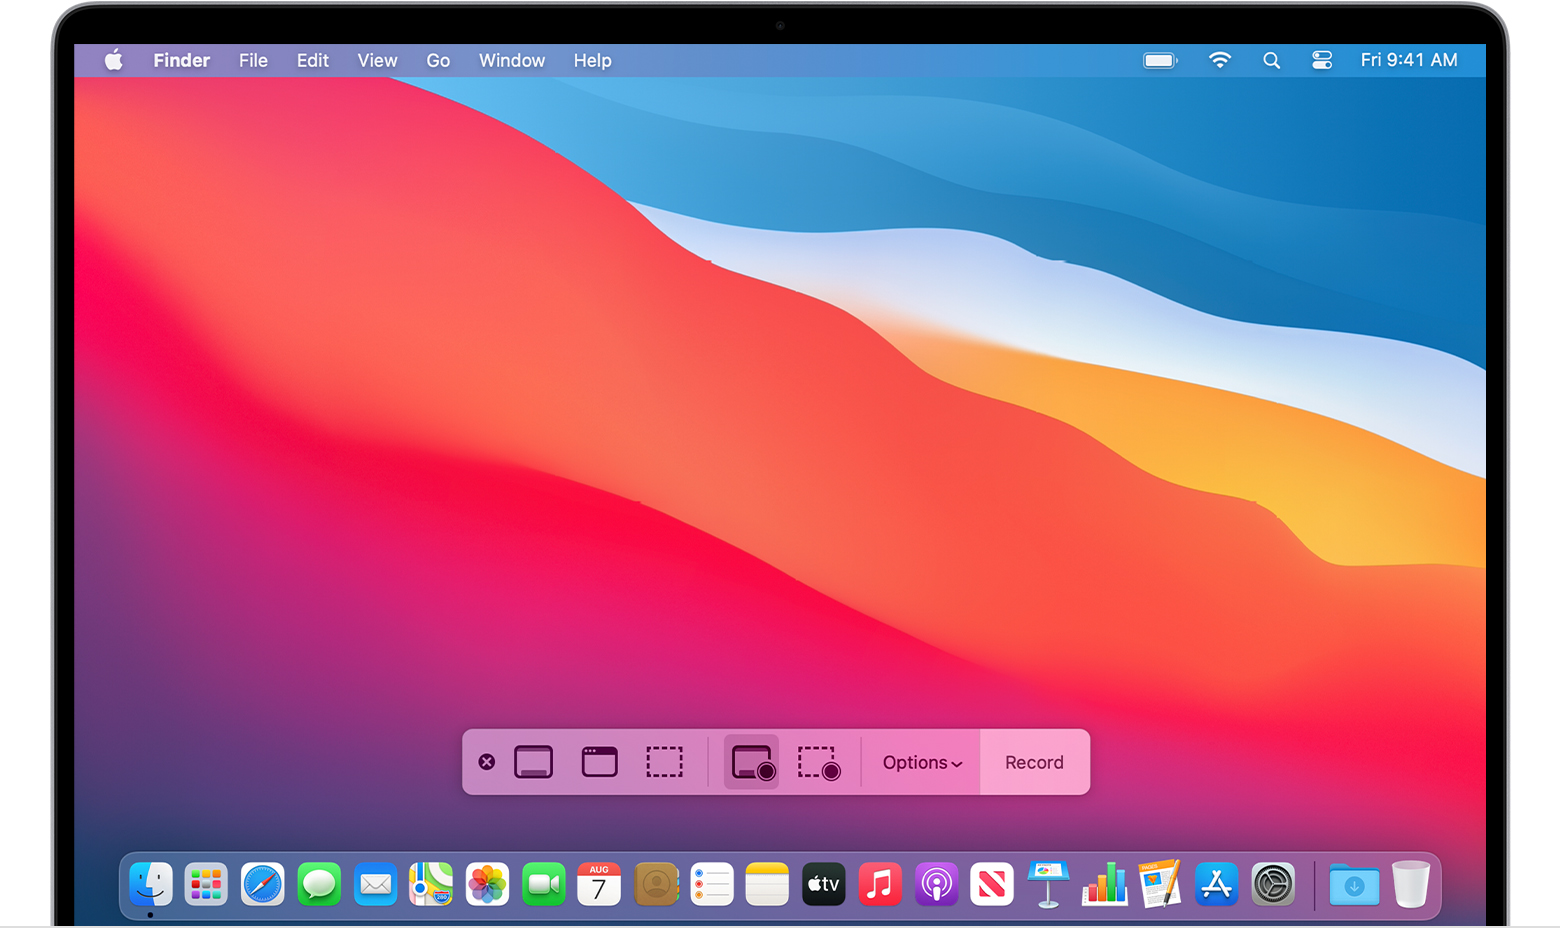
STEP 3
Click anywhere on the screen, and the recording will start.
STEP 4
When you are done with screen recording, press the Stop recording button at the top right or press the Command + Control + Esc at the same time.
STEP 5
Use the thumbnail to share, save, or trim your recorded video.
And you are done!
How to record a selected portion of the screen on Mac?
If you want to record a selected portion of the screen on Mac, you just have to change your choice of the icon in the second step of the previously mentioned process. This time, you will choose the fifth icon and select the area you want to record. Everything else stays the same.
How to record screen on iPhone?
If you are a person that is always on their phone, knowing how to record the screen on iPhone is a handy skill. Luckily, iPhone has software that can help you with it. It is called TechSmith Capture, and it is easy to use. Besides, this tool is free.
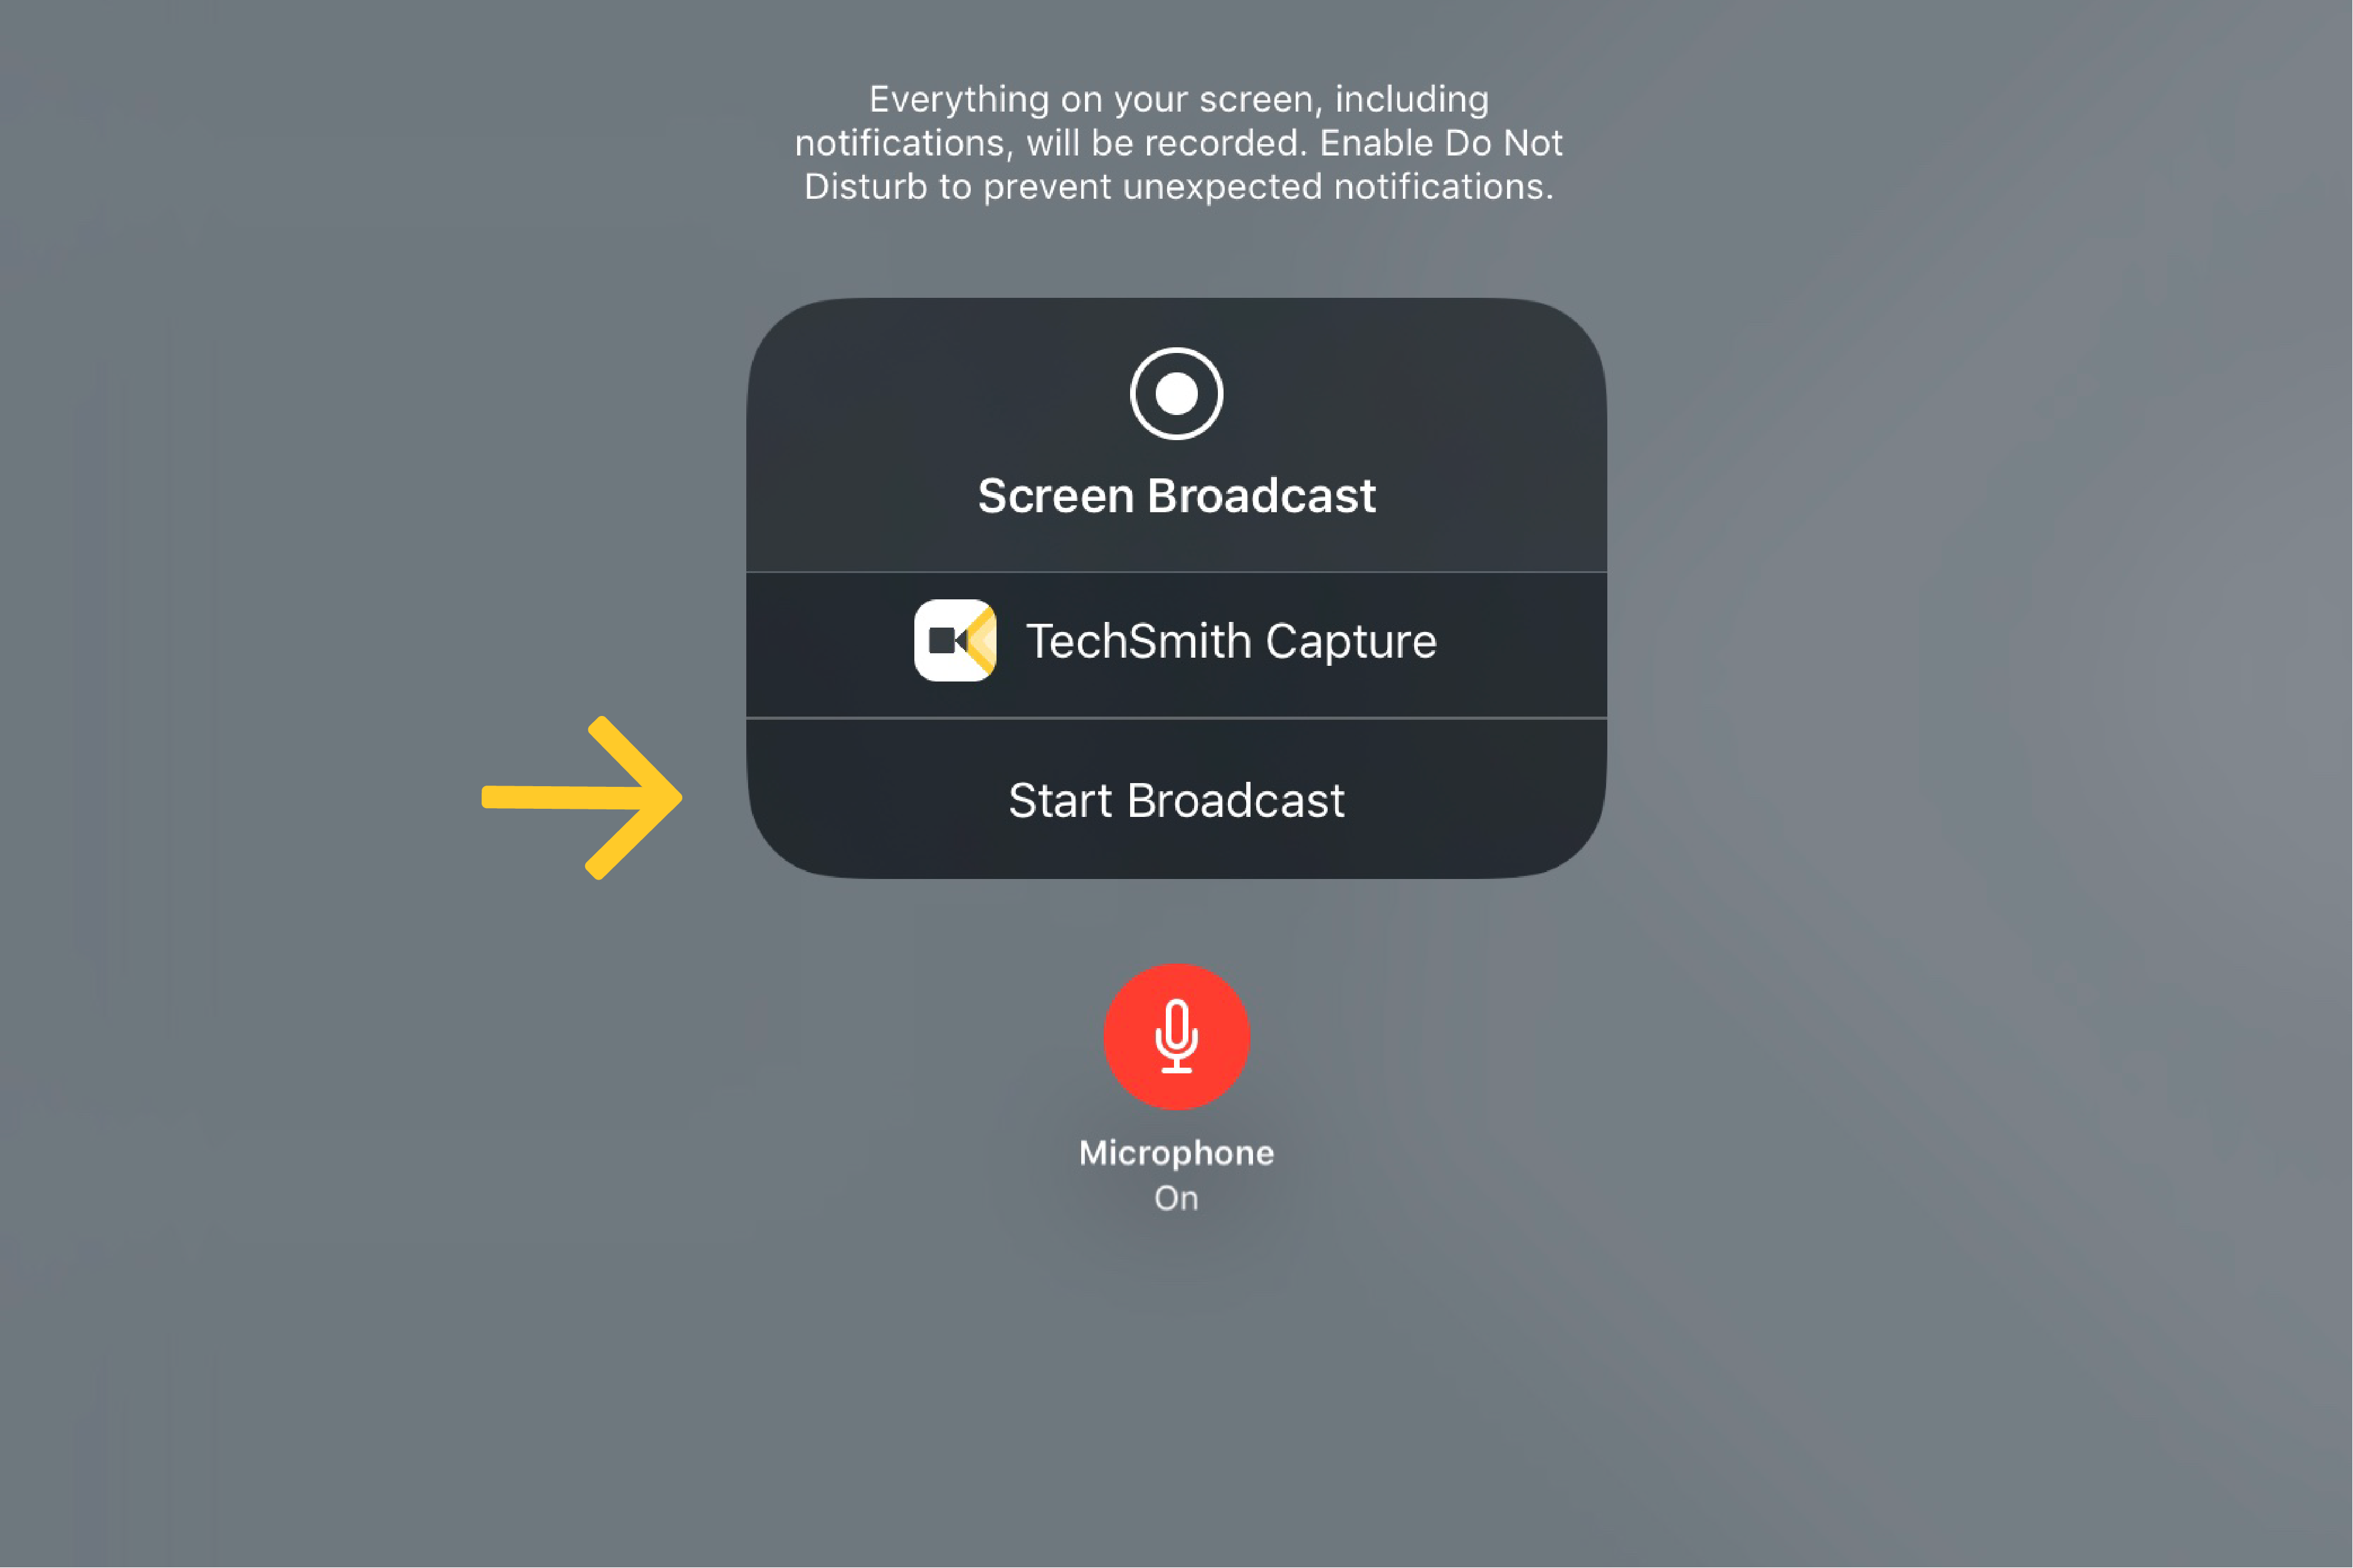
All you have to do is to download TechSmith Capture and enable screen recording in the Settings app. Then, follow the steps below.
STEP 1
Swipe up from the bottom and press the screen recording button.
STEP 2
Select the TechSmith Capture and tap the Microphone Audio button to record audio.
STEP 3
Now do your thing, and when you are finished, swipe up from the bottom of the screen and press the Screen Recording button once more.
And that’s it. All your videos are saved automatically and ready for use.
How to record screen on Android?
If you are not an Apple fan, there is good news. You can easily record the screen on Android as well. Follow the steps below, and you will record the screen in no time.
STEP 1
Swipe down two times from the top of your screen to the bottom.
STEP 2
Tap the Screen record button. If you can find it right away, press the Edit and then drag the Screen record to your Quick Settings.
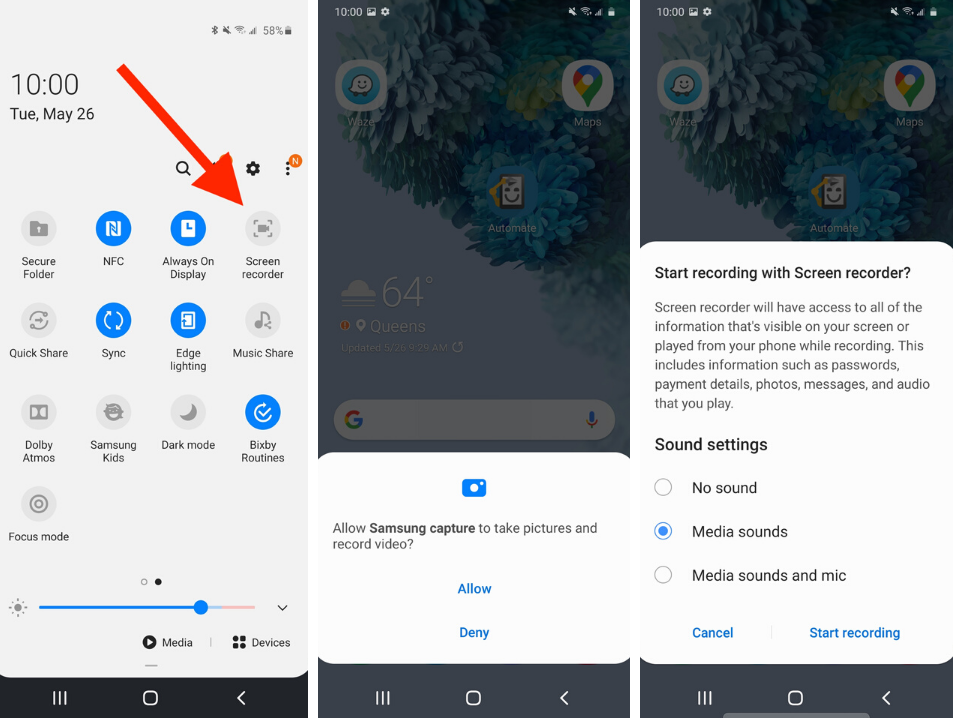
STEP 3
Choose what you want to record and press Start. The countdown will start, and the recording right after that.
STEP 4
To stop screen recording, swipe down and press the Screen recorder notification.
You are done. All videos are saved in the Library archive folder Movies.
Final words
When it comes to screen recording, possibilities are limitless. You can record the screen online, offline, with third-party software, or without it. In the end, it’s up to you. We did our part and showed you how to record the screen in several different ways.